


Changing Interchangeable Load Cells
If your tester was ordered with interchangeable load cells they are easily switched as needed for testing. The instructions that follow apply to testers with a load cell encasement labeled as an “Interchangeable Load Cell”.
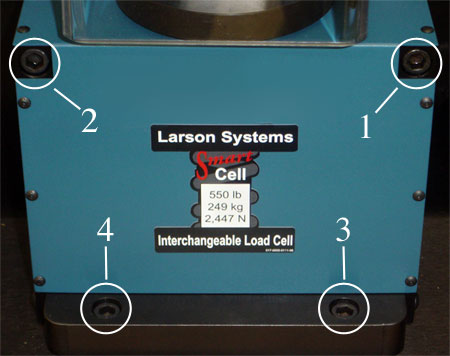
In general each Interchangeable Load Cell is secured to the tester with four hex screws.
1. Loosen the hex screws with a 1/4″ hex key starting with the upper right, to the upper left, to the lower right, and finally the lower left.
2. Completely remove the screws in the same order. Set aside.
3. Slightly slide the load cell with encasement away from the tester to disconnect it.
4. As soon as is possible, lift the load cell off and away from the tester.
5. Place the next encased load cell to be used on the tester in front of the connection so the connectors line up.
6. Insert the upper screws in the corresponding holes as far as they will go without tightening.
7. See that the end of the screws line up to the holes on the tester and give the load cell a firm push so the connectors make contact and are secured together.
8. Tighten the hex screws by hand until they stop. Starting with the upper right, then the upper left, then the lower right and lower left.
9. Use the hex key to tighten each slightly. Go around two more times in the same order slightly tightening and finally making sure they are fully tightened.
Recommended last tightening of the hex screw should be 10 ft-lb torque using a torque wrench.
The order of removing and replacing the screws as well as the gradual tightening
movement is important to keep the parallelism stable. The location of the screws and load cell may vary slightly by model.